office bytes

Office Bytes | Oreo Truffles

| Recipe

IMG_2920

Oreo truffle balls — yup, they’re exactly what they sound like, and they’re awesome. Think cake balls, made with Oreos. With literally three ingredients, these are also quite simple to make. Grind up Oreos, add a little bit of cream cheese to bind the crumbs together, form balls, chill, and then dip in candy coating (or chocolate). Et voilà!

IMG_2887 IMG_2889

I often have a difficult time with Wilton candy melt consistency, and prefer using chocolate melting wafers (or tempered chocolate when I have the time and patience). Here, I started out with white candy melts, before moving on to Ghirardelli chocolate melting wafers which gave me a much better control and shine. If I had more time, I would have shaped these a little better and decorated with more polish. But honestly, when it comes to something like Oreo truffles, presentation isn’t all too important. Plus, I was happy to eat up all the ones that failed my quality control inspection 🙂

IMG_2918

Oreo Truffles
Makes 18-24 balls (depending on size)

Ingredients:
  • 1 package (14.3 ounces) Oreo cookies
  • 6 ounces cream cheese, chilled and cubed
  • candy wafers or tempered chocolate

Directions:

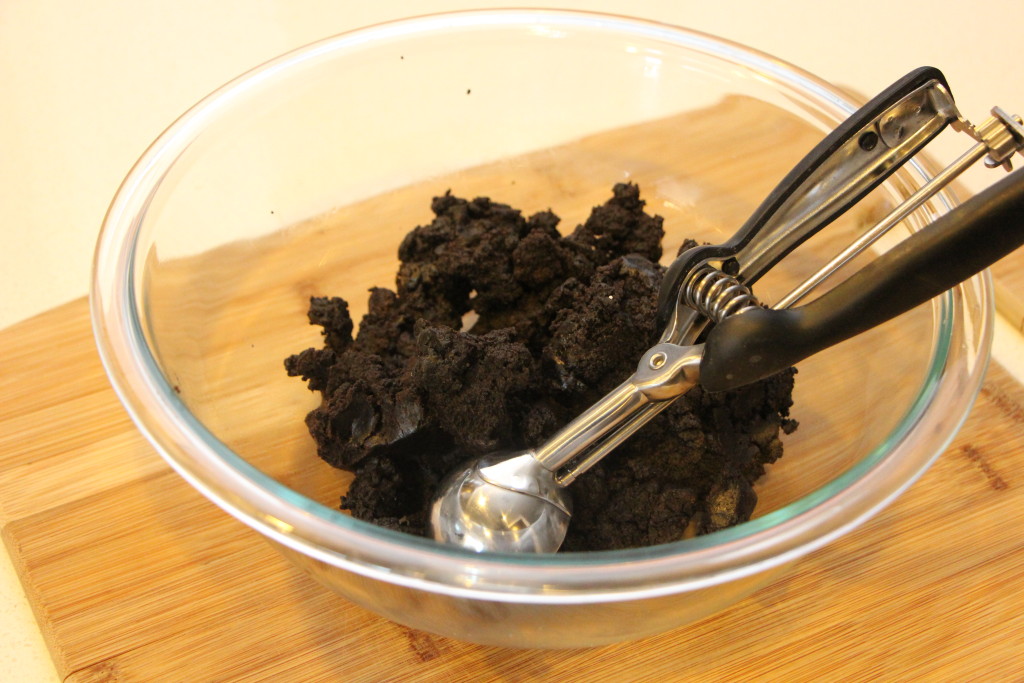
  1. Ground up one package of Oreos in a food processor.
  2. Add chilled and cubed cream cheese into the food processor. Pulse about a dozen times or until it comes together. Do not process more than needed, as the mixture will become greasy.
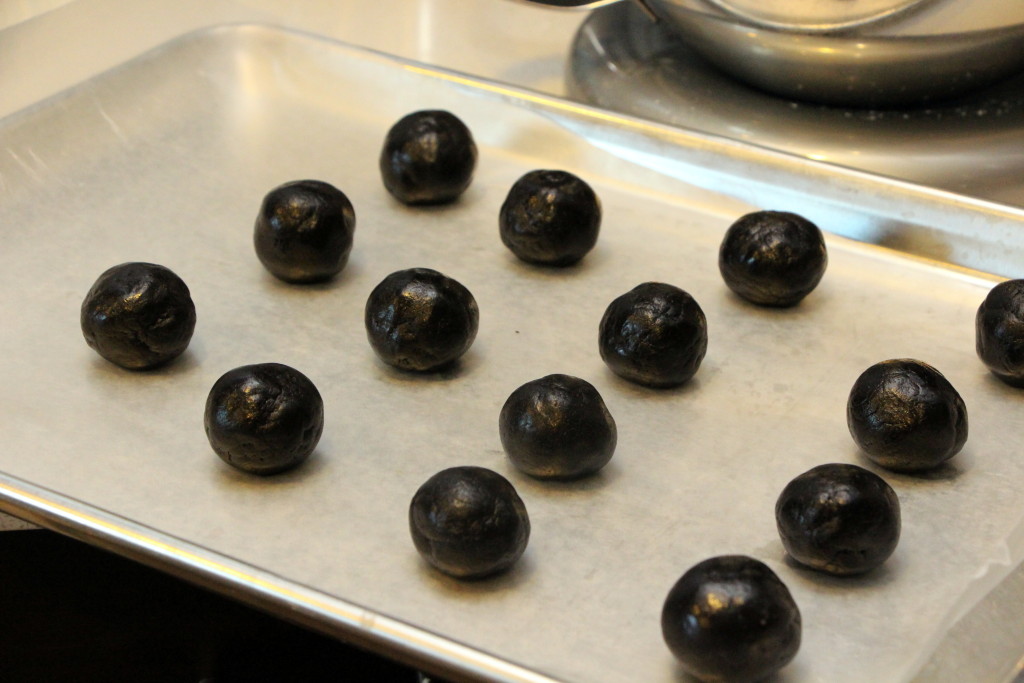
  3. Portion with a cookie scoop, spoon, or just your hands, and roll into balls. I recommend wearing gloves. A cake pop mold press would also work. Chill on a wax paper lined sheet pan for at least 10 minutes.
  4. Melt candy wafers and thin out if necessary, or melt and temper chocolate.
  5. Remove balls from fridge. Submerge truffle balls in bowl of candy coating or chocolate using dipping forks (or if you don’t have one, use a plastic fork with the middle tine(s) snapped off).
  6. Shake off excess coating and place ball on wax paper to set.
  7. Try not to eat them all before sharing with others.
0 comment

Office Bytes | Kouign Amman

| Recipe

IMG_3347

ETA: Commercial grade aluminum baking pans make a big difference. I switched to using those instead of the darker non-stick pans (such as Wilton pans), and that eliminated the problem of burning the bottoms of the kouign amman. 

I know I have said that panna cottas are one of my favorite desserts, at least to order at restaurants. But my favorite baked pastry is definitely the kouign amman. I had been meaning to teach myself how to make them but kept putting it off. Then when I saw a class pop up at Baking Arts with Chef Richard dedicated to the kouign amman, I knew I could wait no longer!

There are many very similar recipes online that should all work just fine, so feel free to just search your favorite recipe source. If you just want to know what recipe I’m using (and it’s probably one of the easier recipes), see below. In short, this is like a croissant / puff pastry hybrid. The kouign amman is a laminated yeast-risen dough with sugar sprinkled between layers during the last set of folding. Because the dough is ultimately folded and squished into pastry rings or muffin tins, proofing the dough isn’t a crucial step, and you can use the “quick puff pastry” method of mixing in chunks of butter, instead of the classic croissant or puff pastry method of wrapping a détrempe (dough packet) around the beurrage (block of butter). It’s quicker and more foolproof.

I made these for an office baby shower celebration, with 1/2 standard, 1/4 with orange-zest sugar, and 1/4 with a chocolate hazelnut ganache filling. Everything was going smoothly, through the rolling, folding, sugaring, and forming.

IMG_2899IMG_2906IMG_2904

And then I proceeded to overbake them and burn the sugar on the bottom, despite the otherwise foolproof recipe (that’s what happens when you rely more on the clock than on your eyes and nose). It feels sacrilegious to have blackened my kouign amman, but alas, we all have those days. In any case, if you don’t mind the taste of a dark caramel, they are still yummy! Glad I could share these instead of eating them all myself.

Kouign Amman
Makes 12 pastries

Ingredients:
  • 150 mL cold water
  • 1 tsp instant yeast
  • 60 g (½ cup) cake flour
  • 190 g (1½ cup) all-purpose flour
  • 255 g (½ cup + 2 Tbsp) butter, chilled and cubed (~¼-½“)
  • 1 tsp salt
  • 200 g (1 cup) granulated sugar

Directions:

  1. Mix salt and flours together. Add in 2 tablespoons of butter and mix well (or rub together with fingers) until no lumps remain.
  2. Mix yeast with water and set aside.
  3. Add cubed butter to flour mixture and fold/toss.
  4. Slowly drizzle on the water-yeast mixture in several additions while gently mixing. When the dough just comes together, pour onto table and shape, pat and roll into an approximately 18″x6″ rectangle. Make a letter turn (fold into thirds).
  5. Turn the dough a quarter turn, roll out to the same size, and fold in thirds again. Repeat for a third letter turn.
  6. Chill dough for 20-30 minutes in refrigerator.
  7. Complete two more turns and refrigerate for at least 1 hour or overnight. (Dough can also be frozen, and then thawed overnight.)
  8. Lightly grease a standard muffin/cupcake pan or pastry rings. Preheat oven to 400 degrees (or 350 degrees in a convection oven).
  9. Sprinkle work surface generously with sugar. Complete last letter turn, sprinkling with sugar before folding.
  10. Roll dough into a 12″x16″ rectangle and trim edges.
  11. Cut into twelve ~3.5″ squares.
  12. Fold up the corners of each square and place into prepared muffin cup. Sprinkled with any remaining sugar (and salt, if desired). Let rest for 10 minutes in refrigerator.
  13. Proof dough at room temperature for ~30 min.
  14. Bake for about 35-40 minutes, rotating every 15 minutes, until browned.
  15. Remove the kouign amman from tins immediately and let cool on parchment.
0 comment

Office Bytes | Vols-au-Vent Puff Pastry

| Uncategorized

French for “windblown” (I learn something new every time I use wikipedia in preparation for my blog posts), these hollow puff pastry shells are an amazing vehicle for both sweet and savory fillings. They’re made with two discs of puff pastry, with the bottom one docked to minimize rise, and the top one with a hole cut out to create the hollow.

For a recent surprise baby shower at work, I wanted to bring an easy finger food dessert other than cupcakes, as I knew the party organizers had already pre-ordered cupcakes from a bakery shop. I made these vols-au-vent, half filled with lemon curd crème légère, and half filled with vanilla crème légère, each topped with sliced strawberries. And of course, I used the extra puff pastry dough to make my favorite cinnamon twists 🙂

0 comment

1 2